Just like other electronic devices in your home, water heaters also require proper care and maintenance. Although the smooth working parts can easily deal with cooling and heating issues, it’s important to remember that even the best parts wear out when they’re subjected to constant pressure.
Here we’ll know about the important tips for maintenance of a water heater for prolonging its working life despite its frequent contraction and expansion from the cooling and heating process.
Let’s Assure Safety First
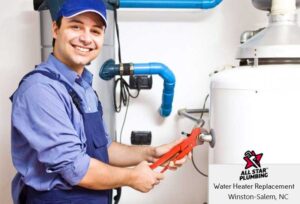
With minimal effort, it’s possible to keep the electric and gas water heaters in good working condition. A few of these repair processes are quite simple, like draining an electric or gas-operated water heater with pressure relief valve turning, pilot light, and tank maintenance. However, if you’re not comfortable while working with electricity and gas, then it’s best to get in touch with professionals from Winston Salem water heater services.
Making a Check on Pressure Valve
Both Electric and Gas operated water heaters are available with pressure and temperature relief valve, (T&P valve) safety devices. When there is more than the required pressure in the tank, the relief valve opens and also releases pressure. When the value does not correctly operate, the tank pressurizes and it can also explode.
For added safety, make sure to wear goggles, gloves along with other protective clothing while you’re performing water heater maintenance.
- 1st step: Turn off electricity directed towards the water heater for turning off gas and for extinguishing the pilot light. Turn off the inlet for cold water to the water heater.
- 2nd Step: Now place a bucket for catching water flow from the valve for pressure relief. Pull lever trip on the valve. Some water and vapor will exit through the pressure relief valve.
- 3rd Step: For replacement of the valve, remove the discharge pipe and also unscrew the valve from the water heater. Now note down stem length and purchase the exact replacement. Screw new valve in place, while tightening with a wrench. Also, recharge the discharge pipe and turn the water on. Either restart the pilot light or reconnect the electricity. Follow the instructions provided by the manufacturer.
Flushing the Tank

The buildup of sediments in the tank lessens the efficiency of the water heater and also clogs water lines. Avoiding such issues also increases the life of the unit through the flushing tank each time while checking the valve of pressure relief.
Instructions
- 1st Step: Turn the electricity off to the water heater for turning off gas for extinguishing the pilot. Shut off cold water inlet to the water heater.
- 2nd Step: Link the garden hose to the drain valve of the tank. Locate the hose draining end in a place that doesn’t adversely get affected through the hot water.
- 3rd Step: With the help of the opening of the pressure relief valve open the drain and also let the tank completely drain off. Total drainage of the tank ensures that all possible sediments have been removed.
- 4th Step: Now close the drain valve of the tank, disconnect the hose through the valve while closing the pressure valve. Open every spigot of hot water in the house, and turn the cold water inlet, to the tank.
- 5th Step: Close all the hot-water spigots as the water starts flowing through them. After you’ve closed all spigots, turn the electricity to the water heater, or turn on the gas switch.
For Electric Water Heaters: Before You Connect Electric Power
Follow a few simple listed steps prior to linking power to an electric water heater.
A few instructions
- 1st Step: Most common issue faced with electric water heaters is also turning the power on before the tank can totally be full of water. When it happens, the upper heating element also burns, and you don’t have any heated water unit upper element which can be replaced.
- 2nd Step: For replacing the bottom or top heating element, disconnect power to the unit and also drain the heater tank. Now disconnect wires from the element while loosening it through the element wrench. Unscrew the element and also pull it out. Now insert the new element in the place and also tighten through the element wrench. Then reconnect wiring while preparing tank refill.
- 3rd Step: Open the hot water faucet to the max while letting the water run for around 3 minutes. It also ensures that the air gets removed and also the tank has been totally filled with water. Also when the tank will be full, make sure to turn the power on. When no hot water is available after two hours, it should be ensured that the unit has the right voltage. Wrong voltage results in further electric water heater problems.
Fixing Drips and Leaks
These steps can be followed for handling drips and leaks.
A few instructions
- Step 1: A lot of heater leakages are due to faulty connections to the water supply. Ensure that the right techniques have been applied along with good materials and also carefully check the work done. When compared to copper pipes, it’s simple to install compression fittings for DIYers, which require soldering.
- Step 2: Many drips from temperature and pressure (T&P) relief valve discharge pipes typically mean that the thermal expansion tank is required.
Adjusting Down Water Heater Temperature
Generally, water heaters get installed at a preset temperature ranging from 130 to 140 degrees Fahrenheit. According to the Department of Energy U.S., it is recommended to have a set of around 120 degrees Fahrenheit for many households. They have estimated that it leads to a reduction in energy costs for water heating of up to 5 percent. Also, lowering down temperatures minimizes scalding risks and slows mineral deposit accumulation in the water heater tank.
For lowering water temperature on the gas-operated water heater, turn the temperature dial valve in the gas heater to 120 degrees Fahrenheit.
For lowering water temperature on an electric water heater, you have to remove the little metal panel which covers the thermostat:
- Turn the water heater power off by switching off the breaker in the breaker box.
- Now, remove the thermostat access panel and then adjust the temperature according to the required setting. It can be done through a flathead screwdriver.
- Replace the thermostat cover and also turn the power switch back inside the power breaker box.
A lot of electric water heaters are available with both lower and upper thermostats. With a lower thermostat, the same temperature setting is available as the upper.
Water heaters don’t require a lot of maintenance, but it’s best to remember to regularly drain them with adequate maintenance measures. These steps are helpful to ensure its proper functioning with the smooth flow of hot water. People who are not interested in DIY measures can get in touch with Winston Salem water heater services to get their repairs and maintenance done by industry experts.